Jetwing Wing Printing and Assembly
- Robareeno

- May 14, 2023
- 3 min read
Updated: Aug 26, 2023
Here's how to print and build the wings.

Complete printed components overview
Wing Spars:
Laser Cut Spar option:
Not much to do here. Take em out of the box they are ready to go.
3D printed Spars:
Print Setting: Tough PLA solidbody print.
Orientation: These are printed lying flat on the build plate.
Supports: - Off.
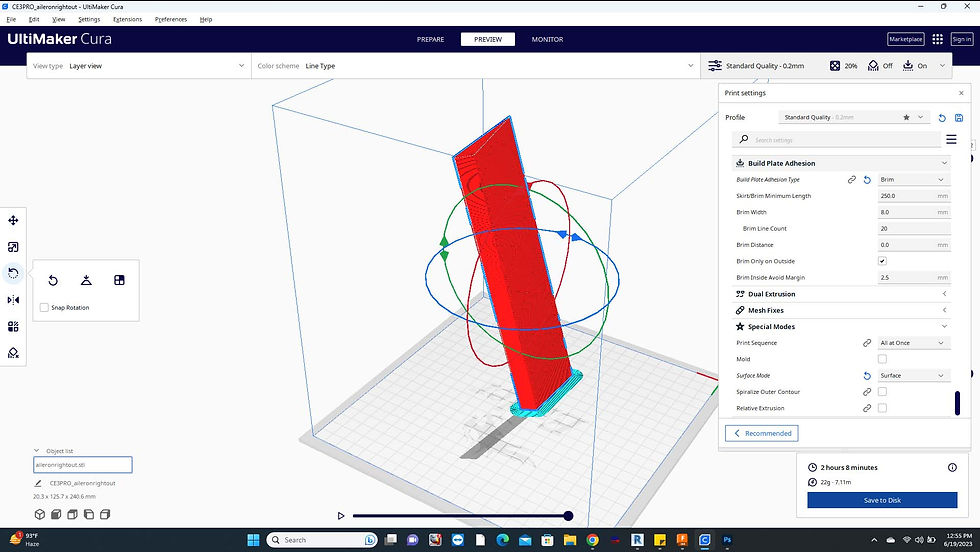
Inboard wing:
Print Setting: LWT Singlewall
Orientation: See Image: This is the right side shown. Do the reverse of this for the left side.
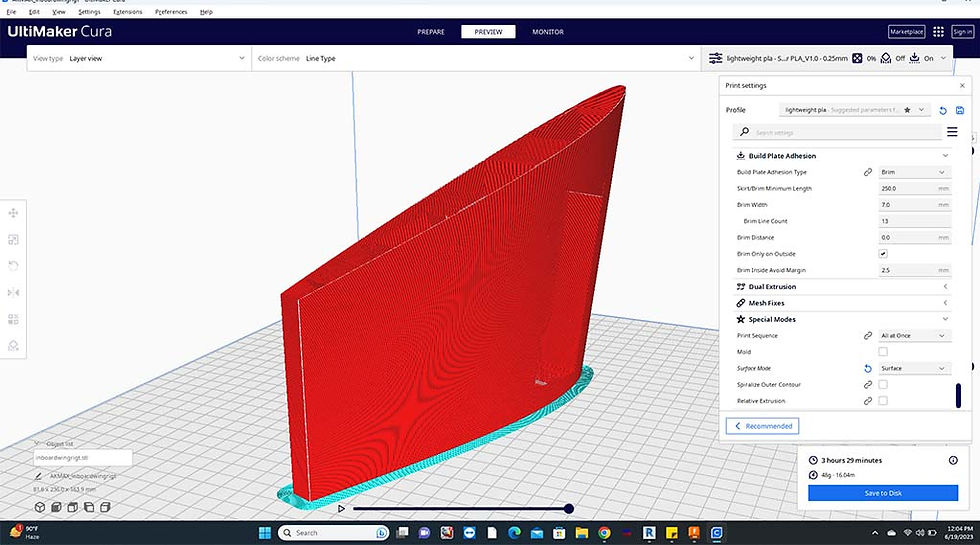
Supports: - off
Brim: on
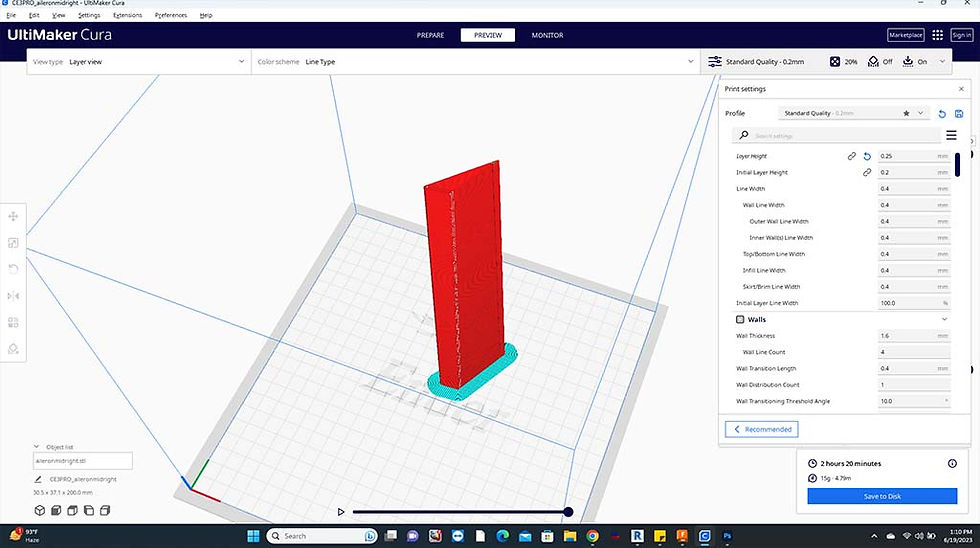
Mid Wing:
Print Setting: LWT Singlewall
Orientation: See Image: This is the right side shown. Do the reverse of this for the left side.
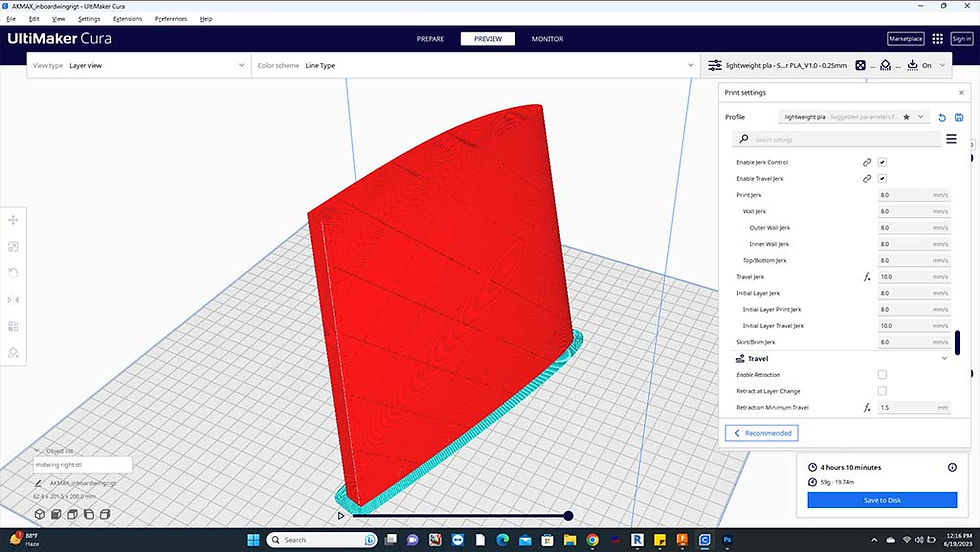
Supports: - On.
Outboard Wing:
Print Setting: LWT Singlewall
Orientation: See Image: This is the right side shown. Do the reverse of this for the left side.
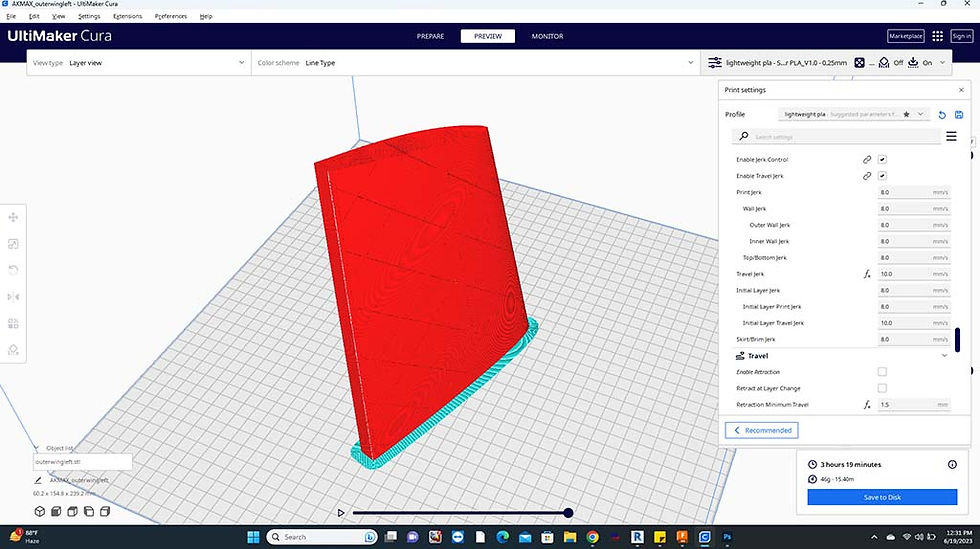
Supports: - On.
Winglet:
Print Setting: LWT Singlewall
Orientation: See Image: This is the right side shown. Do the reverse of this for the left side.
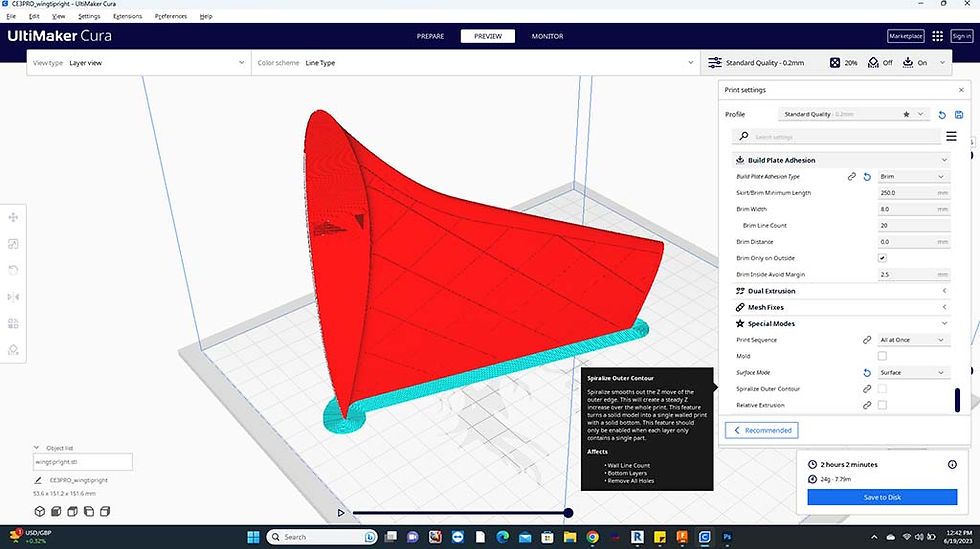
Supports: - On.
Elevons:
Outboard:
Print Setting: LWT Singlewall
Orientation: The Elevons are printed on it's outboard edge.
Supports: - Off
Remaining sections:
Print Setting: LWT Solidbody - this is done for strength when twisting.
Orientation: The Elevons are printed on it's outboard edge.
Elevon control Horns:
Print Setting: PLA or tough PLA. 100 percent infill. Wall loops minimum of 2
Orientation: See pic. these can be printed together.

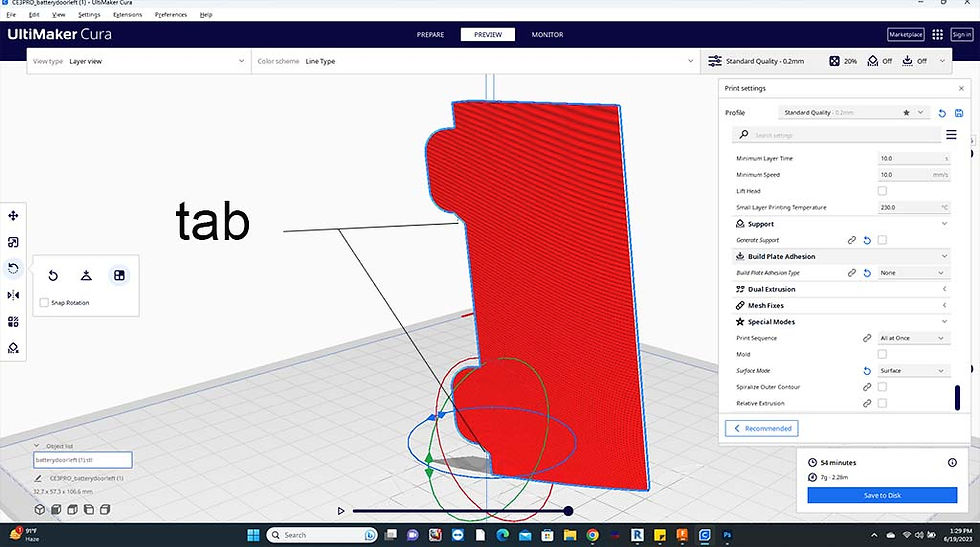
Battery Doors:
Print Setting: LWT Singlewall - this is done for strength when twisting.
Orientation: The battery doors have a small sacrificial chamfer on one side of the tabs in lieu of having to print with supports on. See Pic. These tabs must face down on the build plate.
Elevon Hinges:
It's recommended to use a clean metal or glass table top with a crisp edge. Span a length of clear postal self adhesive packaging tape across the edge of the table, the full length of the elevons. You will want to overlay the edge of the table approximately 1/2" or 12.5 millimeters. Using a sharp razor blade then cut along the edge of the table top creating a perfectly straight, thin strip of tape. Now reposition the tape on the edge of the table again this time on the mid line of the tape. Carefully set one of the elevons under the exposed edge of the tape and carefully adhere it to the tape. Once attached, carefully remove the assembly from the table top. Now carefully align the elevon to the wing ensuring that you have it in the fully down deflected position. Then adhere the newly exposed edge of tape to the trailing edge of the wing. This tape will not permanently adhere until you take this next step. flip the wing over, and run a generous bead of thin CA glue down the inside of the joint so that it can wick under the tape on both the wing and elevon. Flip the wing back over and ensure that the tape is fully contacted on both the trailing edge and the elevon. Be careful not to deflect the elevon again during this stage as you don't want to bond the actual elevon to the wing. Once this glue sets, you will have a very strong, permanent, and flexible gapless hinge.
Conclusion: That is it for the wing! Check the main blog here for anything you may have missed, but at this point it's time to go fly! Feel free to reach out to us with any questions. We will attempt to clarify the construction blog including your input as much as possible.

Comments