Free Mini Extra 300 Radio Installation.
- Robareeno

- Mar 15, 2022
- 2 min read
Updated: Feb 23, 2024
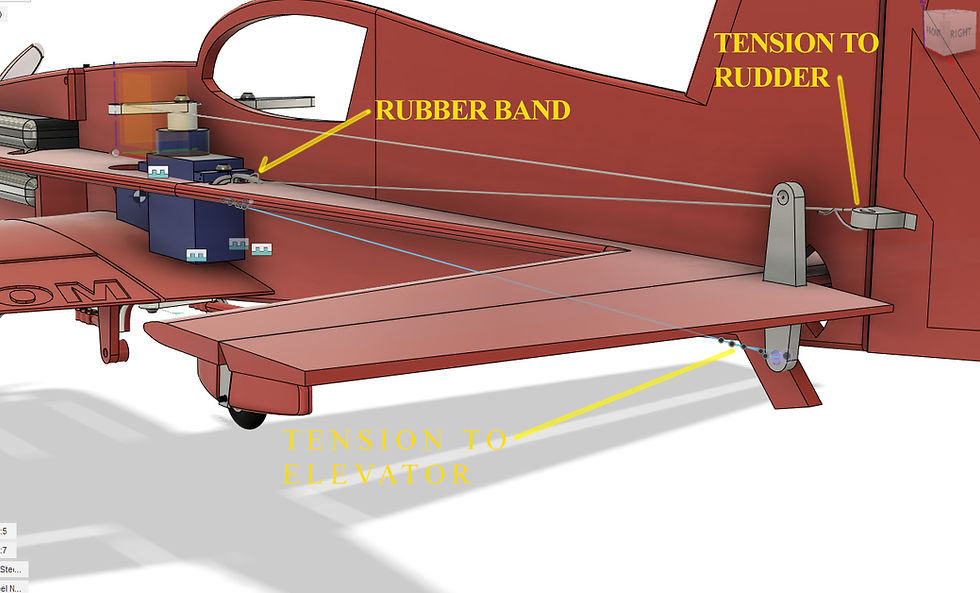
Rudder and Elevator Servos:
In an effort to save as much weight as possible, I abandoned the idea of pushrods altogether and began experimenting with a pull system. In the end, what I discovered was a way to eliminate slop in the control system, and add just about zero tail weight to the model in the process. This fancy system is actually just thread, not clothing thread, but rather Kevlar thread and can be found at many common fabric shops. Alternatively if this is not available, Upholstery thread is more than strong enough for this application and is readily available. On the left side of the model just behind the elevator servo mounting point you will find two small holes. These are to provide at attachment point for two small rubber bands. the thread is attached to them, and then to the back side of both the rudder and elevator control horn. You will want to provide a small amount of tension that the opposite side mounted to your servo arm will counteract. The system will always be in tension just slightly.
Custom Adjustable Pushrod:
Print setting: "Solidbody Rigid"
Supports On.
Orientation: This is a very curvy part, there is no real way of laying it flat on the build plate. Simply get is as close as possible, and ensure the supports can be created underneath.
How is this adjustable? There are three different holes at the servo horn side that can be used do better dial in your circumstances. I'm still at a loss as to why this is necessary considering the precision of a printed wing but even I have had to use different ones at times.

Conclusion:
That is it for the Servo Installation Check the main blog here for the next steps. Feel free to reach out to us with any questions. We will attempt to clarify the construction blog including your input as much as possible.


Comments